Setting Users and Roles
Managing your store effectively often requires assigning roles and permissions to different team members. Storeino allows you to add users and define roles with specific permissions. Follow this guide to set up users and roles in your store.
Storeino ecommerce academy : adding new users to your store
Steps to Add Roles and Users
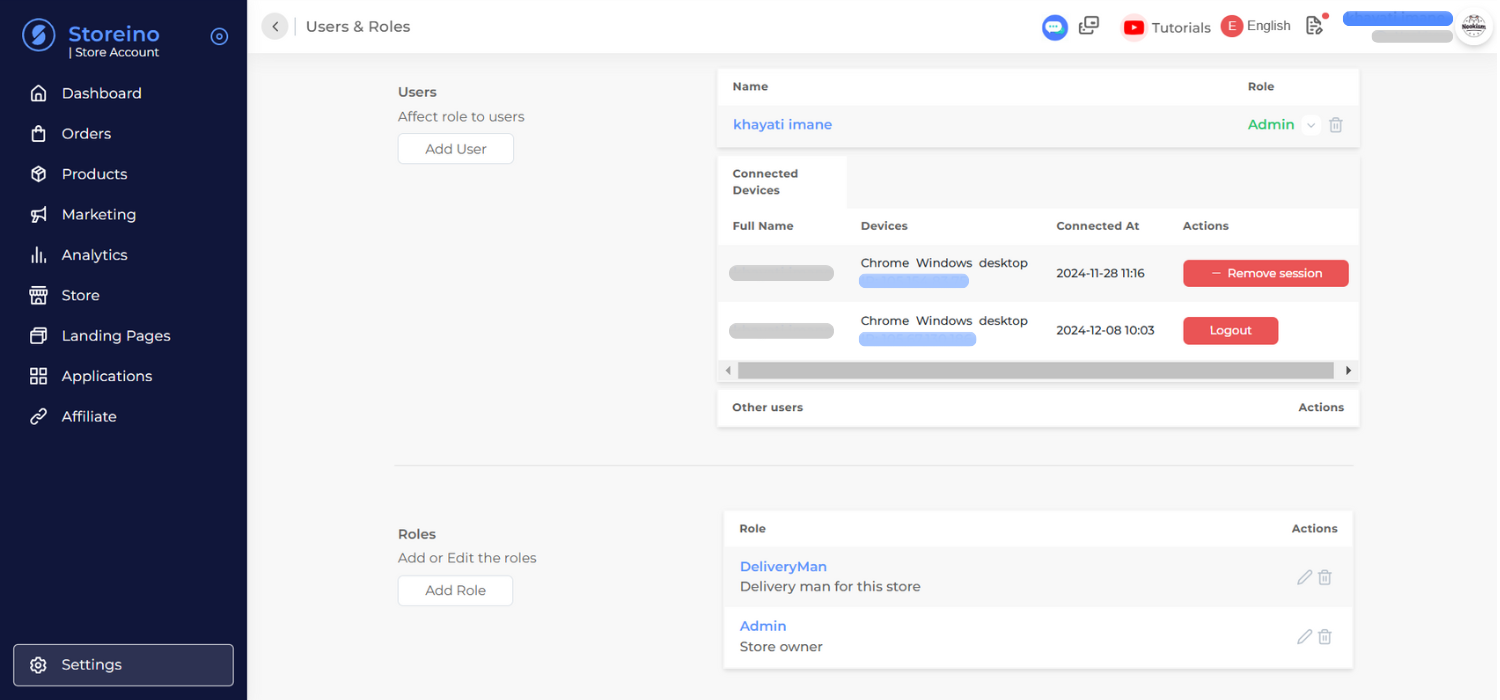
1. Access the Users and Roles Section
- Navigate to Settings in your Storeino dashboard.
- Click on Users and Roles, where you will find two tabs:
- Users
- Roles
2. Create a New Role
- Click on the Add Role button.
- Name the Role:
- For example, “Shop Manager.”
- Optionally, add a description to clarify the role’s purpose.
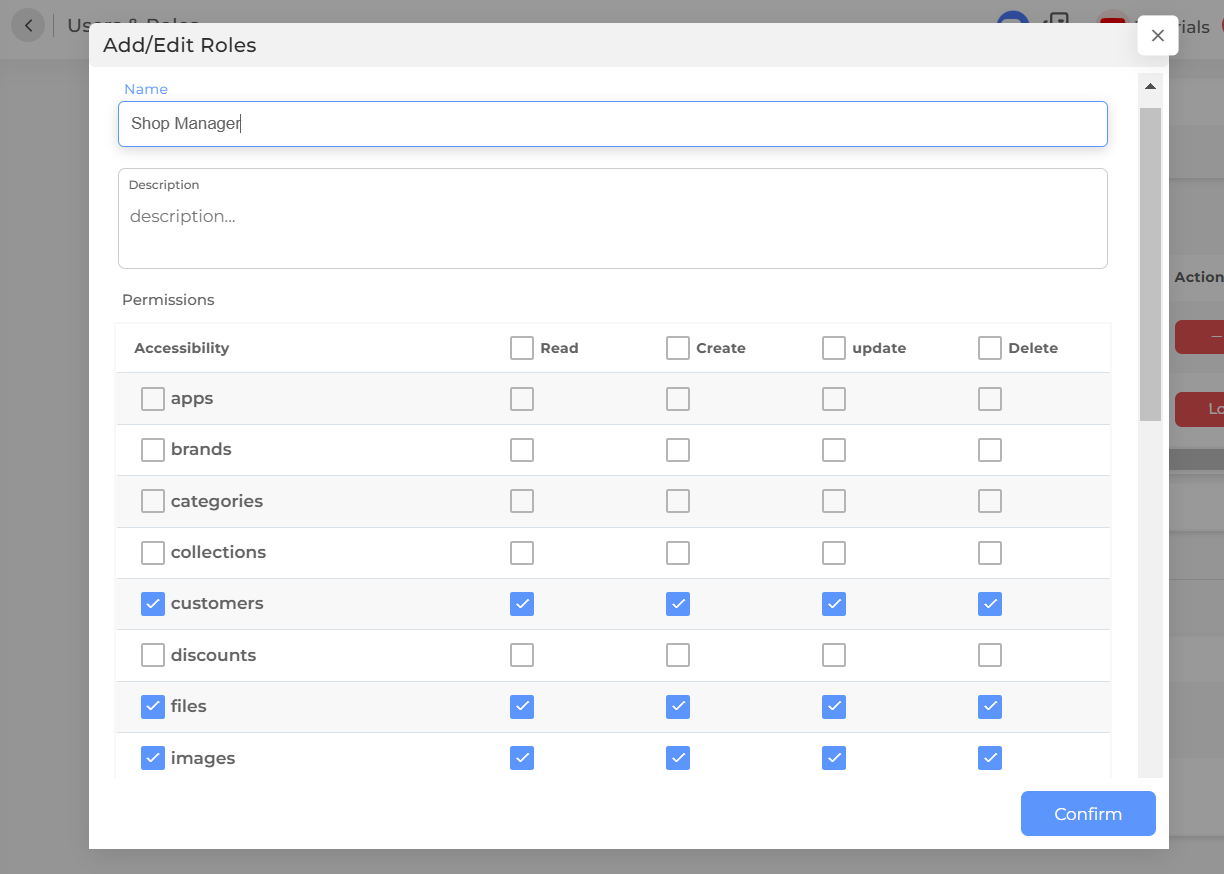
- Set Permissions for the Role:
- Choose what actions the role can perform, such as:
- View, create, update, or delete for specific sections like brands, categories, collections, customers, etc.
- Customize the permissions according to your needs.
- Choose what actions the role can perform, such as:
- Once the permissions are set, click Confirm to save the role.
- The new role (e.g., Shop Manager) will now appear in the list of roles.
3. Add a New User
- Switch to the Users tab.
- Click on the Add User button.
- Fill Out the User Details Form:
- Enter the required information, such as name, email, or other details.
- Click Confirm to save the new user.
- The user will now appear in the list of users.
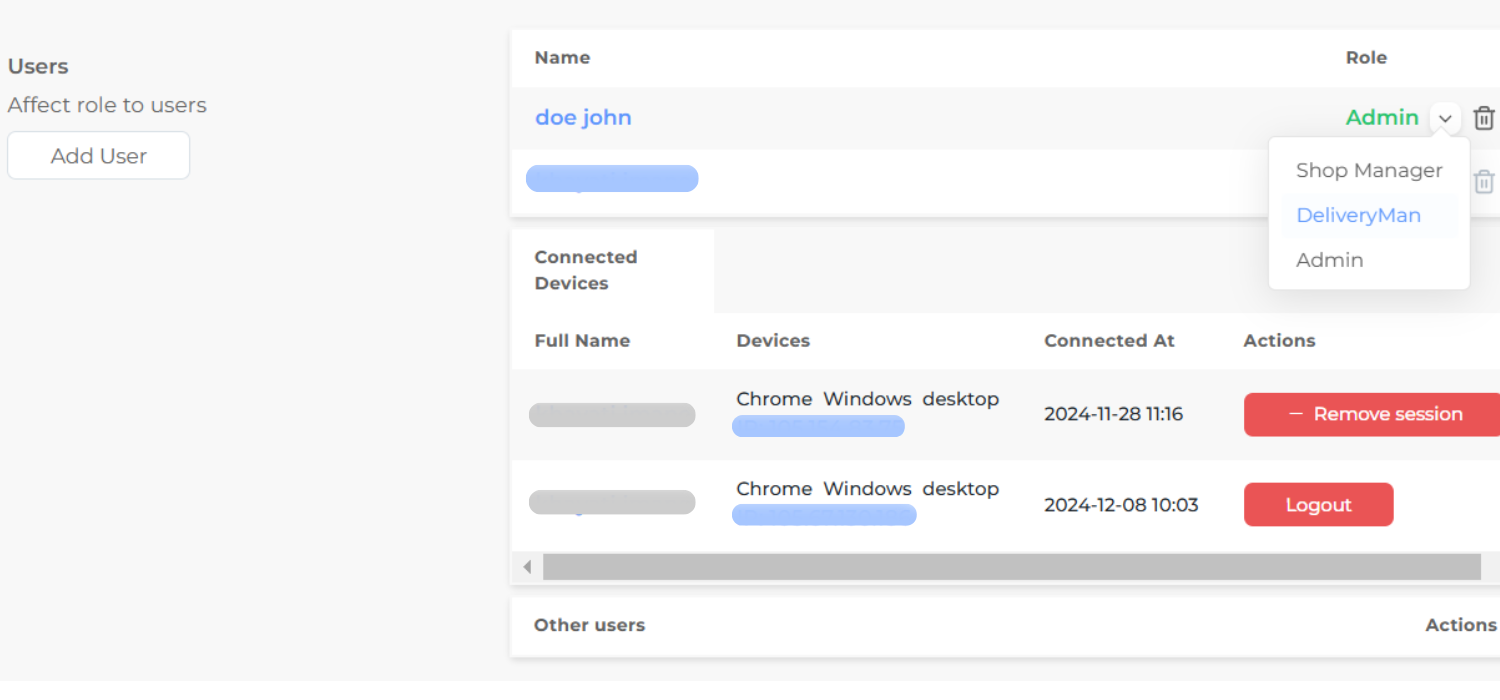
4. Assign a Role to the User
- Find the newly added user in the Users list.
- Click the dropdown menu under the role column for that user.
- Select the desired role (e.g., Shop Manager) to assign it to the user.