Adding Products to Your Store
The process for adding more products to your store is the same as adding your first one.
Storeino ecommerce academy : Adding products to your store
Follow these steps to add a product to your Storeino store.
Step 1: Navigate to the Products Section
- Go to the “Products” section in your store dashboard.
- Click on “New Product” to begin adding a new product to your store.
- Select your product type.
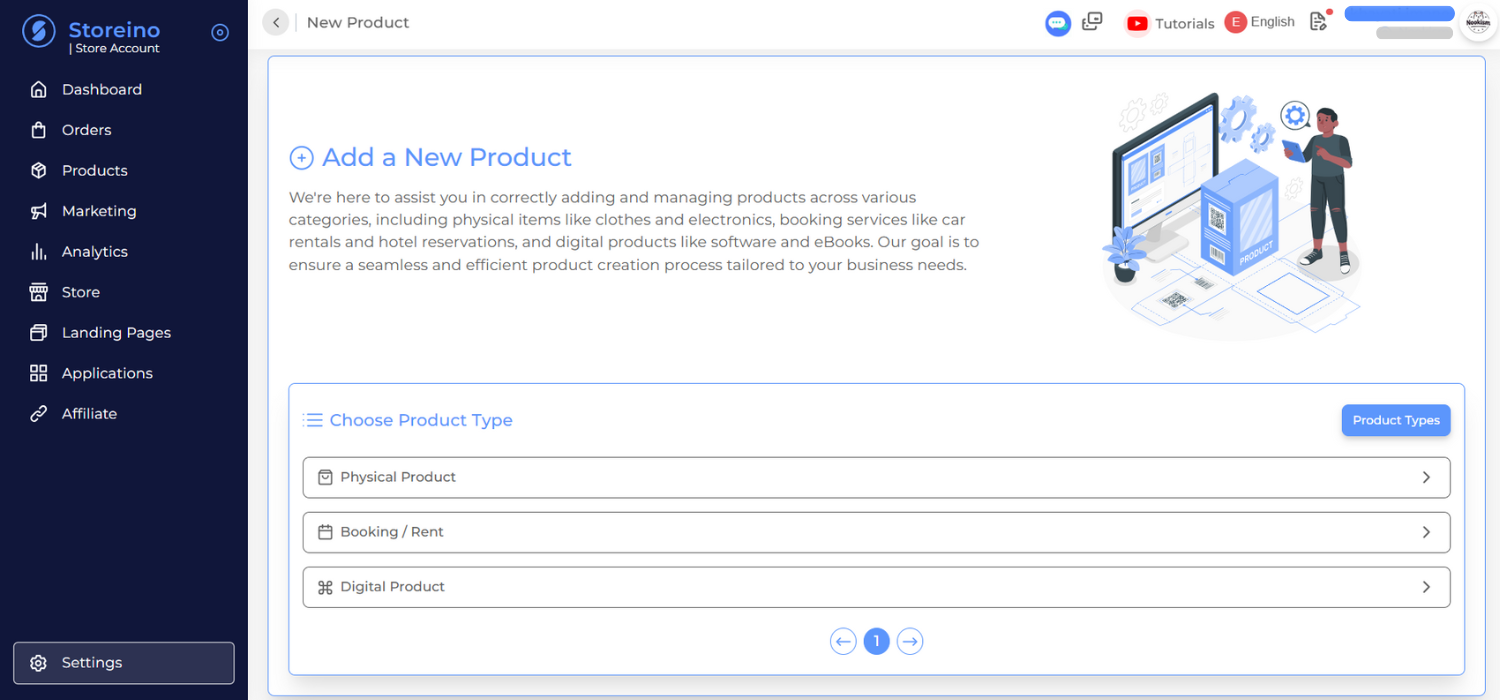
Step 2: Enter Product Information
- Fill in the product information, including:
- Title: The name of the product.
- Sell price: The price displayed in the store.
- Compare price: The price without any discount (regular price).
- Buying price: The cost price of the product.
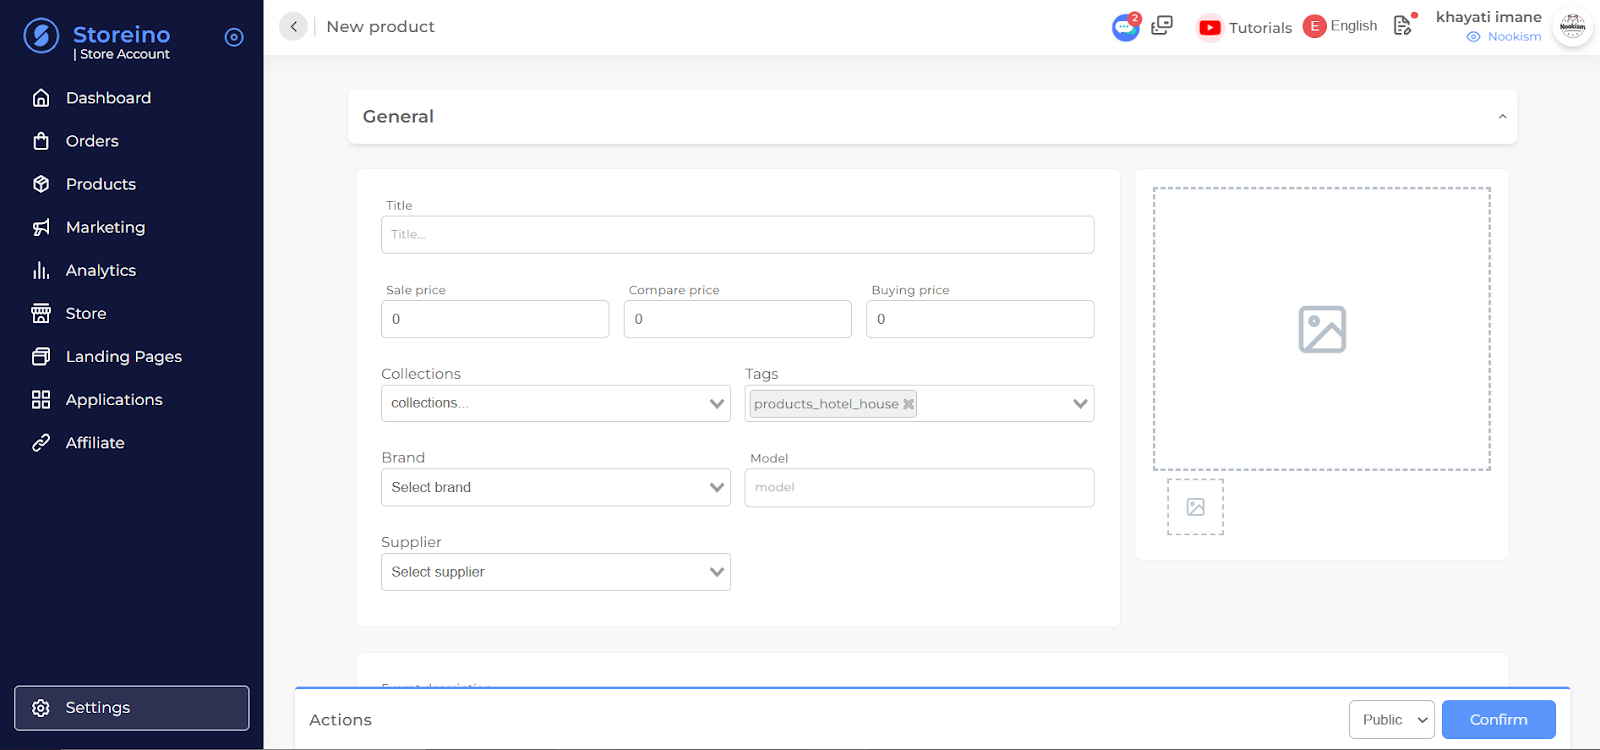
Step 3: Select Product Collection and Tags
- Choose the collection that the product will be part of.
- Add relevant tags to make it easier for customers to find your product during searches.
Step 4: Add Product Images
- Select a picture for the product from the image library or upload a new image from your computer.
- You can upload multiple images to showcase different angles or details of the product.
Step 5: Add Product Description
- Add a detailed description of the product, explaining its features and benefits.
Step 6: Add Product Variants (Optional)
- If the product has multiple variants (e.g., sizes or colors), click on “Options”.
- Choose the product variants (size, color, etc.) and enter the price and quantity for each variant.
Step 7: Add Pictures for Each Variant
- Choose a picture for each variant to visually distinguish them for your customers.
- Make sure the product is set to “Public” so it appears on your store’s website.
Step 8: Confirm and Add Product
- Review all the product details, and when everything looks good, click “Confirm” to add the product to your store.