Adding a Logo to Your Store
Follow these simple steps to add a logo to your Storeino store:
Step 1: Navigate to the Settings Section
- Go to the Settings section in your Storeino dashboard.
- Select the General option, where you’ll find the “Your Store Logo” option.
Step 2: Choose and Upload the Logo
- Click on the “Your Store Logo” option.
- Select the logo image you want to use and click “Insert Photo” to upload it.

Step 3: Confirm the Changes
- After uploading the logo, click “Confirm” to save your changes.
Note: The logo may not be visible immediately after uploading.
Step 4: Refresh the Store Page
- Refresh your store page to see the updated logo. The new logo should now be displayed.
Step 5: Logo Successfully Uploaded
- Once the logo is visible, your process of adding a logo to your store is complete.
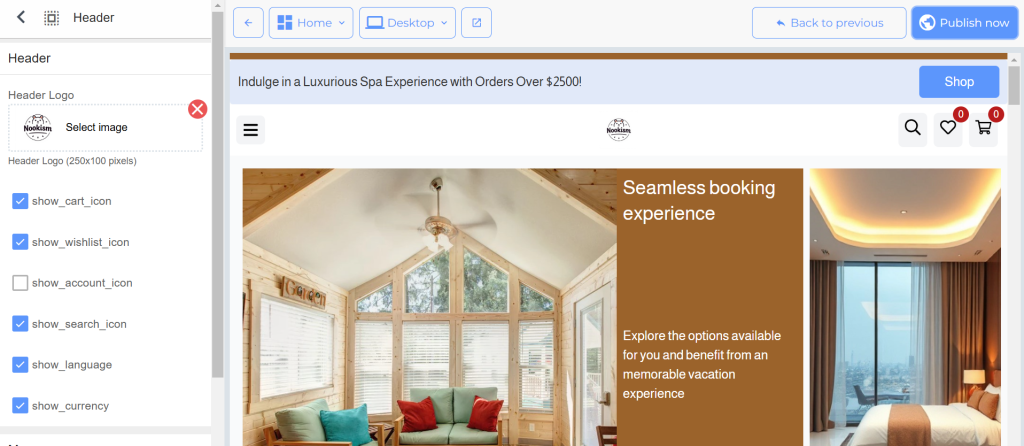
Alternative: Setting logo on the theme customizer
Another way if you want to set a logo to your store you can go to your customizer and set the header logo there.