Organizing Products into Collections
You can create product collections to organize your products, making them easier for your customers to find. For example, you can create the following kinds of collections: selection conditions to automatically include matching products. A manual collection includes the specific products that you choose.
Follow these steps to create and manage collections for better organization and navigation of your store.
Create Collections
- Go to the “Products” section in your store dashboard.
- Click on “Collections” on the top and then select “New Collection”.
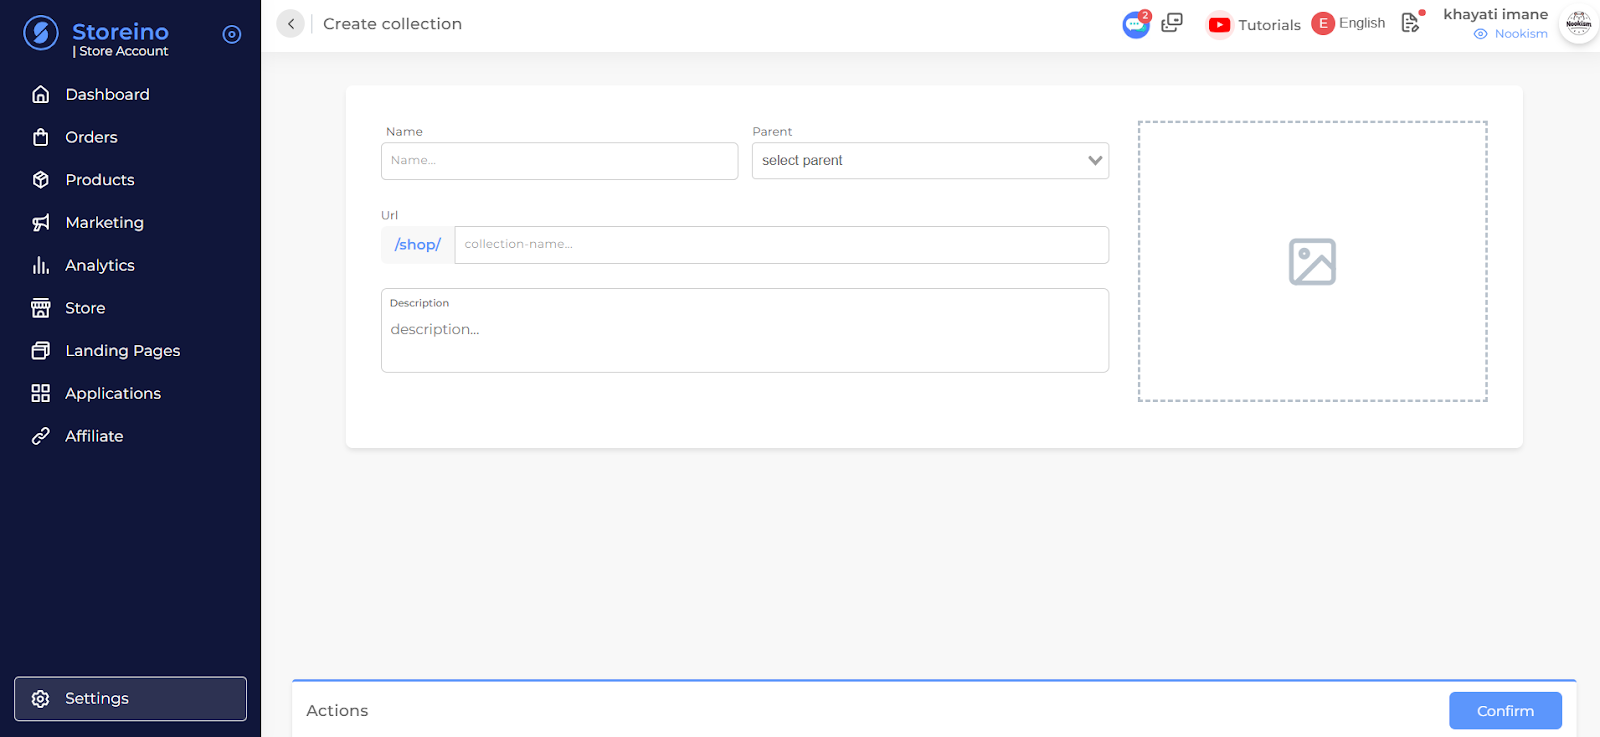
Step 2: Name and Customize Your Collection
- Enter a Name for the collection, such as “Cosmetics”.
- A unique link for the collection will be generated automatically.
- You can modify this link if desired.
- Add a Picture to represent the collection:
- Click “Add Picture”.
- Select the desired image and click “Confirm”.
Step 3: Add Additional Collections
- To create another collection, repeat the steps:
- Navigate to “Products” > “Collections” > “New Collection”.
- Navigate to “Products” > “Collections” > “New Collection”.
- Give the new collection a Name, such as “Skincare”.
- Organize your collections:
- Use the “Parent Collection” dropdown menu to make it a sub-collection of an existing collection (e.g., Skincare under Cosmetics).
- Use the “Parent Collection” dropdown menu to make it a sub-collection of an existing collection (e.g., Skincare under Cosmetics).
- Add a photo for the new collection and click “Confirm” to save.
Step 4: Review Your Collections
- After creating collections, go back to the “Collections” section to view and manage them.
- All collections will be listed, allowing you to edit or organize them further.